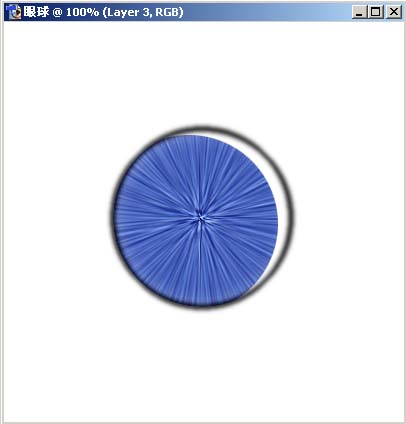
8. 新键图层Layer3,按住Ctrl去点图层Layer1得到圆圈选区,并在图层Layer3上填充白色,移动键盘上的方向键到合适的位置,按Del键删除多余部分,得到如图效果。
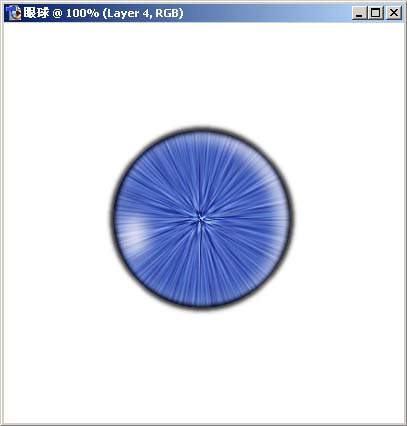
9. 执行菜单filter(滤镜)/blur(模糊)/guassian blur(高斯模糊),其中Radius为7,图层的透明度为80%。再新键一个图层Layer4,用Eliptical Marquee tool(椭圆选取工具)画一个椭圆填上白色,执行菜单filter(滤镜)/blur(模糊)/guassian blur(高斯模糊),其中Radius为7,图层的透明度为80%,并将椭圆移动到左下部。
10. 执行菜单filter(滤镜)/blur(模糊)/guassian blur(高斯模糊),其中Radius为7,图层的透明度为80%。再新键一个图层Layer4,用Eliptical Marquee tool(椭圆选取工具)画一个椭圆填上白色,执行菜单filter(滤镜)/blur(模糊)/guassian blur(高斯模糊),其中Radius为7,图层的透明度为80%,并将椭圆移动到左下部。

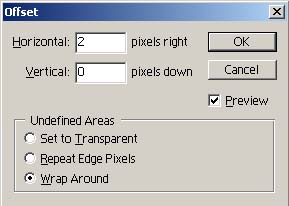
11.选中图层Layer1,执行菜单filter(滤镜)/other(其他)/offset(偏移量),其中Horizontal(水平方向)为2,其他选项为默认。
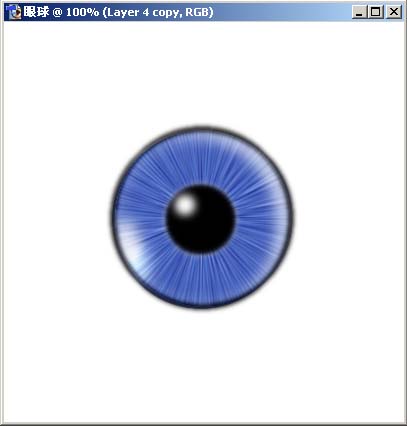
12.再新键图层Layer7,使用Eliptical Marquee tool(椭圆选取工具),按住Shift键,在画面的中央画小的正圆,并填入白色,将图层Layer7放置在图层面板的最上面,执行菜单filter(滤镜)/blur(模糊)/guassian blur(高斯模糊),Radius为4,将白色圆圈移动到相应部位。

13. 最后再对眼球进行一点修改。选中图层Layer5,执行高斯模糊2个相素。再选中图层Layer4,并复制得到Layer4 copy,将图层Layer4 copy移动与Layer4 交叉开来,并将图层模式改为Linear Light,透明度为45%。一个眼球就这样完成了。