1.首先设置场景
显示单位比例(display unit scale) : meters
系统单位比例(system unit scale) : meter
2.创建一个平面,尺寸可根据场景的需求而定,Segments 网格密度同样根据雪地的凹凸程度来定。本例中我使用的参数如下:
尺寸:10m x 10m
lenght segment: 30
width segment : 30
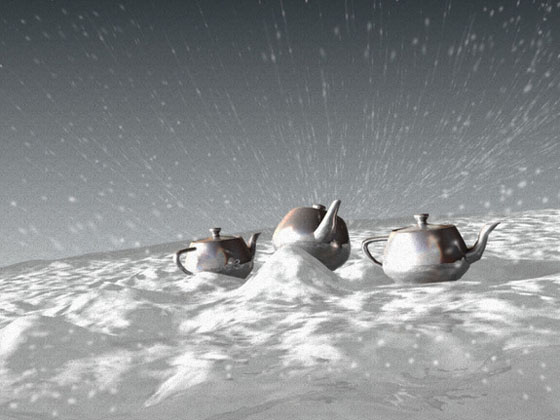
3.在场景中央随便创建个物体,别让画面空着就行。本例中我摆了3支茶壶。
4.创建一个 camera,以便于后期的图像输出。角度和高度随意。
5.创建用于全局照明和场景效果用的灯光。先在右侧加入一盏 omni 泛光灯,强度为0.5,颜色为93、96、97,关闭阴影;然后在左侧放入一盏 direct 平行光灯,强度1.75,颜色为纯白,打开 shadow map,启用 far attenuation 远端衰减范围为 start=16 end = 22m。
6.现在开始制作雪地,为平面添加一个 nois 修改器,使平面有起伏凹凸的效果。segments 的数量越高,起伏凹凸的效果越丰富。
7.创建雪地材质,选择一个材质球重命名为雪地,将 diffuese 颜色设为白色,self illumination 为50;展开 Maps 面板,将 bumps 通道强度设为75,并在右侧的贴图通道中选择 smoke。在 smoke 参数中,设置 size尺寸= 1,phase相位= 1,iterations重复= 5,color1 设为深灰色,color2设为白色。接下来将 reflection 通道强度设为15,选择 raytrace 光线追踪作为反射贴图。
测试渲染
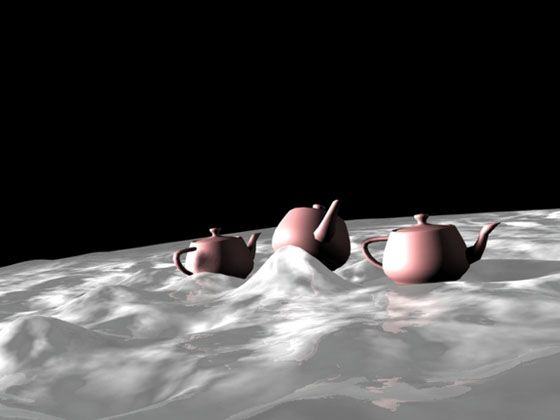
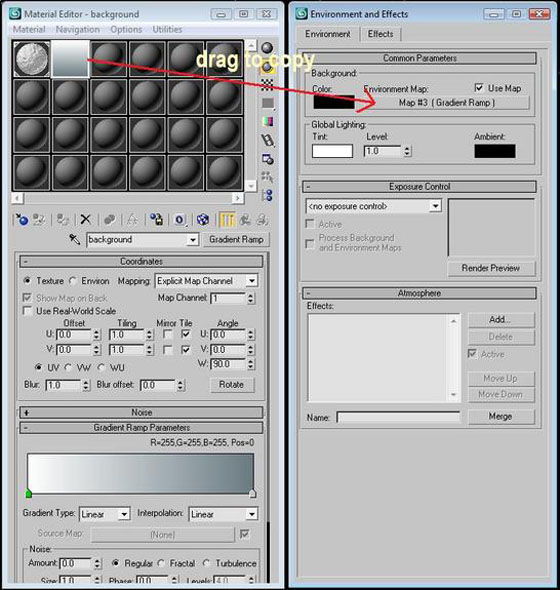
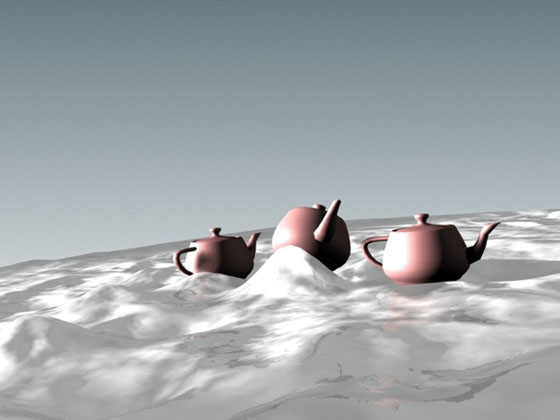
8.背景使用 gradient ramp 线形渐变贴图,参数如下。
测试渲染
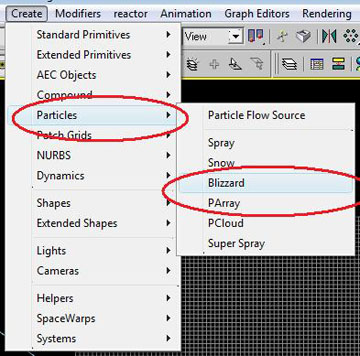
9.现在开始制作飘落的雪花。打开 creating 创建面板,在下拉列表中选择 PARTICLE SYSTEMS 粒子系统,object type 物体模式选择 BLIZZARD。在顶视图托揣生成一个大约 6m x 6m 的粒子发生器,和雪地平面对齐,然后在左视图调整高度,使镜头中可以看到雪花。
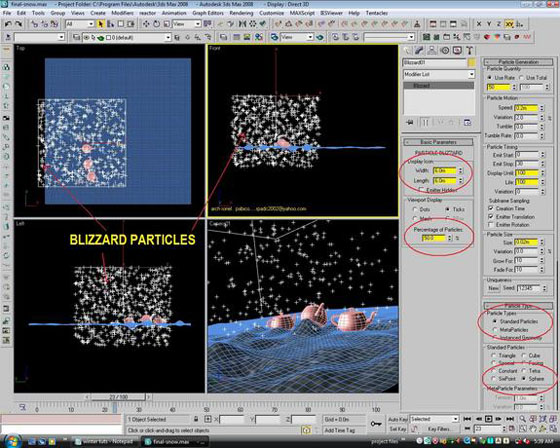
保持选中 blizzard 暴雪发射器,进入 modify 修改器面板,在 Basic 参数栏的 Viewport Display 中选择 ticks 显示模式,percentage of particles 设为50%,将时间滑块拖动到30观察效果。
在 Particle generation 子面板中,将 Use Rate 值为50,Particle Motion speed(粒子运动速度)= .2m,variation(变化)= 2%。Particle Timing 粒子时限的 display until=100,life to = 100,particle size = .02m,variation to 5。在 Particle type 粒子类型中定义粒子的渲染形态,选择 standard particles 标准粒子,然后选择 sphere 球形。
现在设置基本完成,为粒子添加刚才制作的雪材质,随时调整粒子的数量和尺寸,以获得最佳效果。
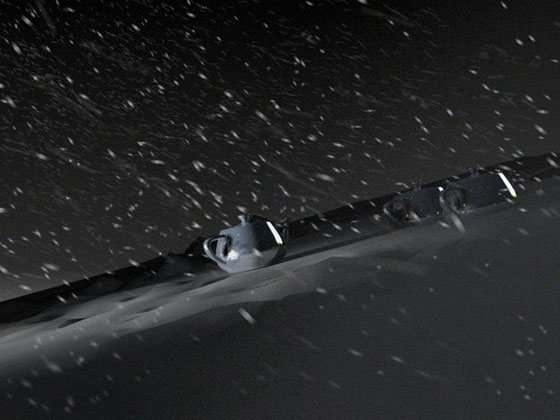
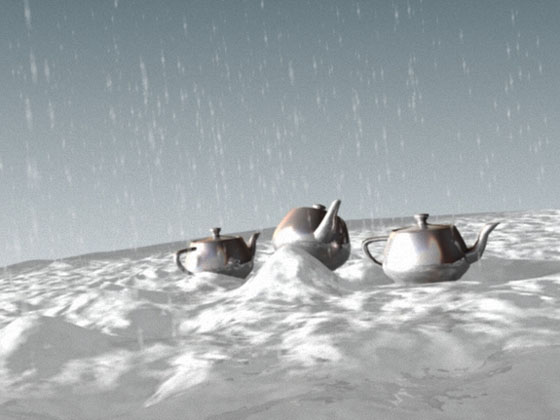
10.雪景已经创建完毕,接下来让我们添加一些特效。右键点击粒子,进入 Object Properties,在 general 选项面板中,激活 motion blur 并选择 image 模式(或 object 模式)。选中 camera,点击 modify,根据不同需要设置相应参数,效果如下图所示。
Motion Blur 测试渲染。
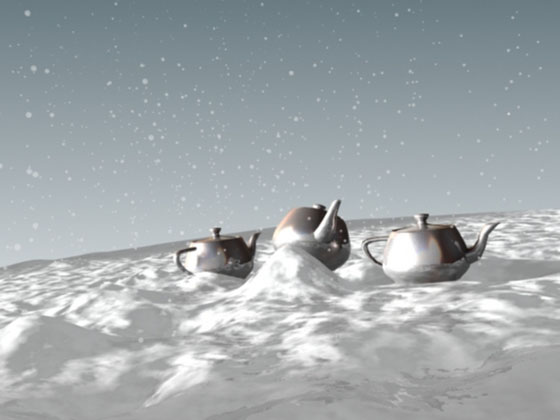
激活 Pass Blending。
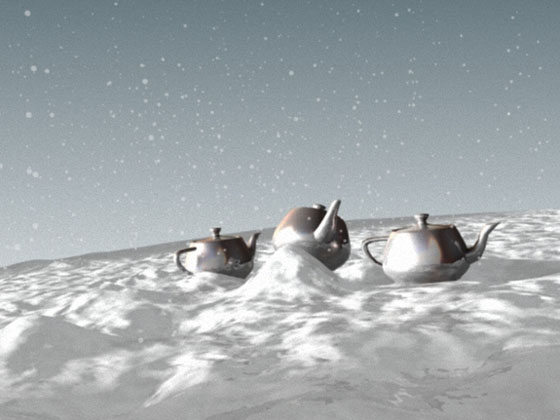
激活 Pass Blending,dither 抖动强度为0.2。
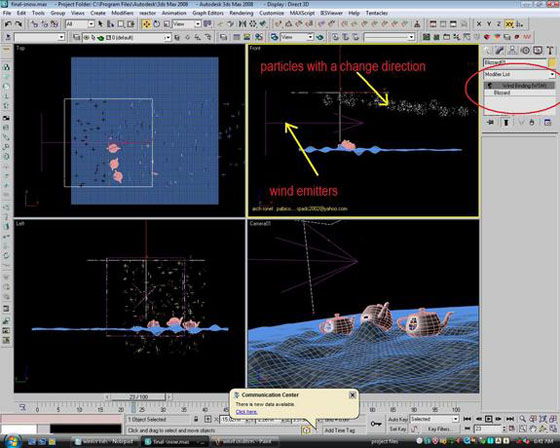
11.最后为雪花添加动作。进入 Creating 创建面板,选择 Space Warps 空间扭曲,Object Type 选择 Wind 风力。在左视图拖动鼠标创建一个矩形的力场,通过旋转调整风向,如下图所示。
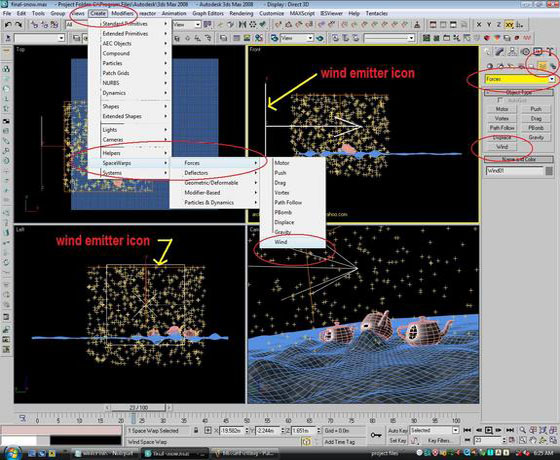
强度设为.2。
12.在力场保持选中的同时,选择工具栏上的 bind to space(绑定到力场)工具,按住鼠标左键从力场拖动到粒子上,显示连接后松开。选择粒子,进入修改器面板,查看是否已成功绑定。然后在力场的属性面板中调整风力参数,直到效果满意为止。
你还可以复制这些粒子,移动到远景,关闭 motion blur,让画面上的雪花看起来更有层次感。